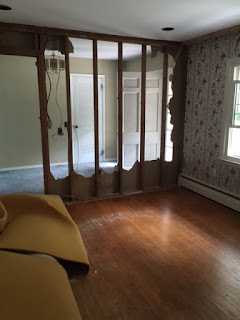

If blogging were a college course I would have a big old "F" at this point. I've been so nutty with clients and helping my friend renovate her house, I haven't had time to share many of the tips I'm using every day on my various projects. So, my apologies. I will try to post with more regularity moving forward as I've received many great questions about everything from painting tips to planning a party, so stick with me and I'll be back to my OLD self soon! SOOOOO...back to Connecticut and the ongoing ranch renovation project. Because my friend is doing this project on her own (with my help) on the weekends, progress is as slow as Sarah Palin answering questions in an interview, but we are getting there. One of the first questions she asked me when we toured the home was how she could squeeze in one more bedroom on the main level. Because the house had a rather large entry with a closet and a random room between it and the kitchen (used as a dining room at one point), I suggested she flip the entry with the dining room and make the old entry (with the closet) a bedroom. She loved the idea so our project got off to a running start, demolishing the walls with lovely floral paper FIRST. Before the walls came down we ripped up the old carpet to find a hidden treasure underneath...beautiful wood floors, which means things are looking up budget-wise (installing wood floors in these areas could easily cost $10,000.00!). Once the walls were down I suggested we map out the new rooms by placing painters tape on the floors to represent where the walls and doors will go. I then taped out furniture pieces so she could get a better idea of exactly how the rooms would feel before we started framing. If I'm doing an exterior addition I use spray paint to map out the rooms, and inside painters tape is a good idea so you can manipulate the space as much as possible before fully committing. Onward and upward we go...


