MELLOW YELLOW


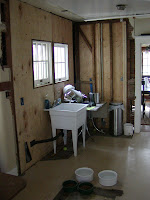
Who says a little paint can't transform a room? Now, the kitchen reconstruction ordeal falls under a totally different archive, most likely leading with "today I wanted to jump in front of a bus..." This month we tackled the arduous task of drywalling, priming and painting the kitchen (hopefully) before Christmas. So, for now I'll skip the twenty steps it took to get us to the painting day and just walk you through this simple process that totally transformed our kitchen. A few questions people always have before dipping the brush in a can of paint: What color should I paint the room? Is the color I chose too bold for a small or dark room? Should I just paint one wall as a "feature wall?" First of all, people, it's PAINT not cement, so it's very, very easy to change. Yes, you can purchase paint samples at your local home improvement store but, at an average of $20/gallon, just pick a color and commit to it! Feature walls, in my opinion, are a cop out. Either commit or don't paint at all. In choosing a color think about what YOU like and how YOU want to feel in the space. I wouldn't advise painting a windowless basement black, but then again maybe you want to use it as a media room and black helps bring it all together. In the case of our Kitchen, I grabbed one of my favorite things...a vintage Yellowware mixing bowl. I took it to our local home improvement store and asked them to scan and match the color. Whatya think?
1.) After priming the walls once (Z-primer or Bins for $25.gal) we purchased two gallons of yellow semi-gloss paint (for kitchens and baths with moisture this is best) and started off by trimming around the ceiling, windows and floors.
2.) Two coats of paint, and here we are. We love it. It's bright, cheery and serves as a perfect backdrop for our collection of Yellowware!
TIME TO COMPLETE PROJECT: 2 hours
COST: $80.00 (2 gallons paint, one gallon primer and tools)
STRESS LEVEL: Low

